
If you are looking for a pumpkin carving idea that’s easy, a little different, and can double for great fall decor as well, pumpkin carving with a drill is for you. You can place these all around the garden and light them with candles (careful!), glow sticks, or even those dollar store LED stick-up lights.
While I think this is safer than using knives to carve, still be very careful using power tools, and know how your drill works. And how to keep yourself safe using it. And if your arm gets tired, give it a rest or take turns. We drilled the pumpkins first, then scooped them afterwards. It seemed to give more stability to the pumpkin while you drill. Yes, your drill bits will get goopy… Just un-goop, and move on. :) However, if you prefer to scoop first, more power to ya! Here’s your tutorial on how to drill pumpkins!
[adsenseyu1]

What You’ll Need
- A pumpkin (a smooth surface makes marking your design easier)
- A power drill
- Assorted drill bits in different sizes
- Painter’s tape
- Dry-erase marker
- Skewer or awl (optional, for starting holes)
- Pumpkin scoop or large spoon
- Small knife for trimming any rough edges
- Battery-operated LED light
Step-By-Step DIY Pumpkin Carving With a Drill
Step One: Mark Your Pumpkin Design
Start by deciding what kind of pattern you’d like to make. You can create a simple repeating design, such as polka dots, or draw something more detailed, like a flower or a star pattern.
Use painter’s tape to help mark straight lines or evenly spaced rows. A dry-erase marker works well for making dots and other marks directly on the pumpkin. Plan the entire design before you start drilling so you can check the spacing and make adjustments.
If you’re creating a pattern with lots of holes, try marking every drilling point first. You can use a skewer or awl to make a small indentation at each mark, which helps keep the drill bit from slipping when you get started.

Step Two: Drill Your Pattern
Choose your drill bits based on the look you want. Smaller bits create delicate pinprick effects, while larger bits make bold holes that let more light shine through. Try alternating bit sizes to add variety and dimension to your design.
Position the drill bit over each marked spot and drill straight into the pumpkin. Work slowly and keep the drill steady rather than forcing the bit through the rind. Make sure the pumpkin is sitting securely on a stable surface, and have someone help hold it if needed. Keep hands clear of the drill bit, and follow the safety instructions for your drill.
As you work, you’ll probably notice that pumpkin flesh and strings collect on the drill bits. That’s normal! Stop the drill before removing any debris, clean the bit, and continue with the next hole. If your arm gets tired, take a break or trade places with a helper.
We drilled our pumpkins before scooping them out because the intact pumpkin seemed to provide more stability. You can scoop yours first if you prefer, but try drilling before removing the insides if you’d like the pumpkin to stay as firm as possible while you work.

Step Three: Scoop and Clean Up
Once you’ve finished drilling your design, cut an opening around the stem if you haven’t already done so. Remove the seeds and stringy pulp with a pumpkin scoop or large spoon, scraping the inside clean enough to make room for your light.
Check the drilled holes for any loose pieces of pumpkin flesh, and use a small knife to tidy up rough edges if necessary. Brush away the remaining debris so your pattern looks neat.

Step Four: Light Up Your Pumpkin
Now for the fun part! Place a battery-operated LED light inside your pumpkin to illuminate the holes and show off your design. We found that small LED puck lights or battery-operated tea lights work well.
For the best effect, display your pumpkin somewhere dim enough that the light can shine through clearly. Try a few different light positions to see how they change the pattern. If you’re displaying your pumpkins outdoors, make sure the lights you’re using can handle the conditions and protect them from moisture.

Pumpkin Drill Design Ideas
One of the best things about pumpkin carving with a drill is how easy it is to customize the design. Here are a few ideas to try.
Drilled Pumpkins with Geometric Patterns
One Little Project has some great ideas for geometric pumpkins – love the mix of the small and large holes here.

Simple Fretwork Drilled Pumpkin
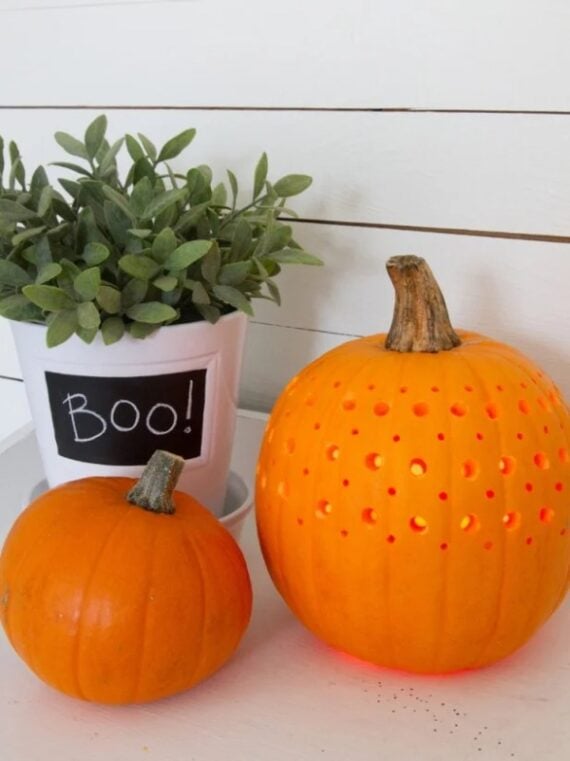
HGTV keeps it simple with this fretwork-style drilled pumpkin idea. It even looks pretty in the daylight!
Pumpkin Drilling Ideas for Different Shapes/Colors
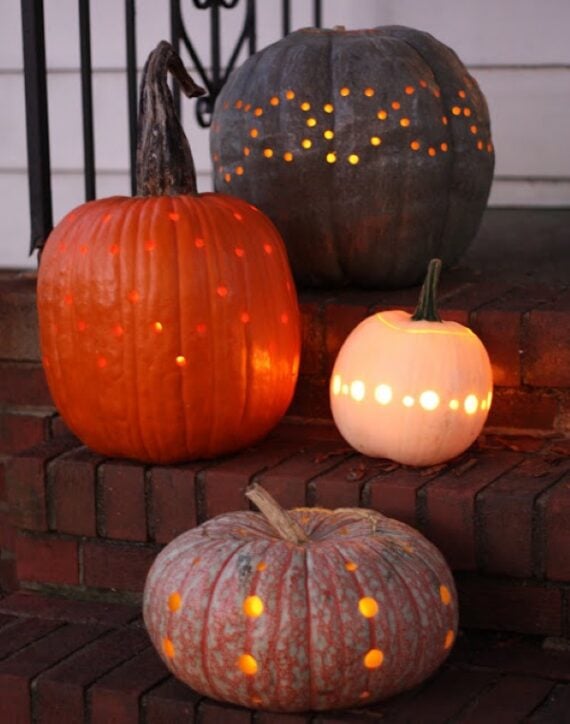
From 17 Apart, the drilling patterns themselves are relatively simple, but the variety of shapes, sizes, colors, and textures of the pumpkins they’ve used really elevates this project. Love how these look!
Drilled Pumpkins with Flower Patterns
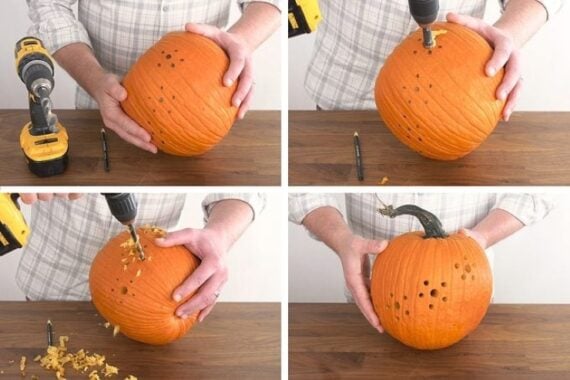
Taste of Home has a traditional pumpkin carving tutorial, but further down the page, they also have a step-by-step guide for making these drilled pumpkins with flower patterns. Easy and elegant!
Zig-Zag Design on Drilled Pumpkin
These zig-zag drilled pumpkins from Family Focus Blog are a great homage to a traditional carved pumpkin mouth. They have lots of other drilled pattern ideas on that page, too!

Coastal Drilled Pumpkin
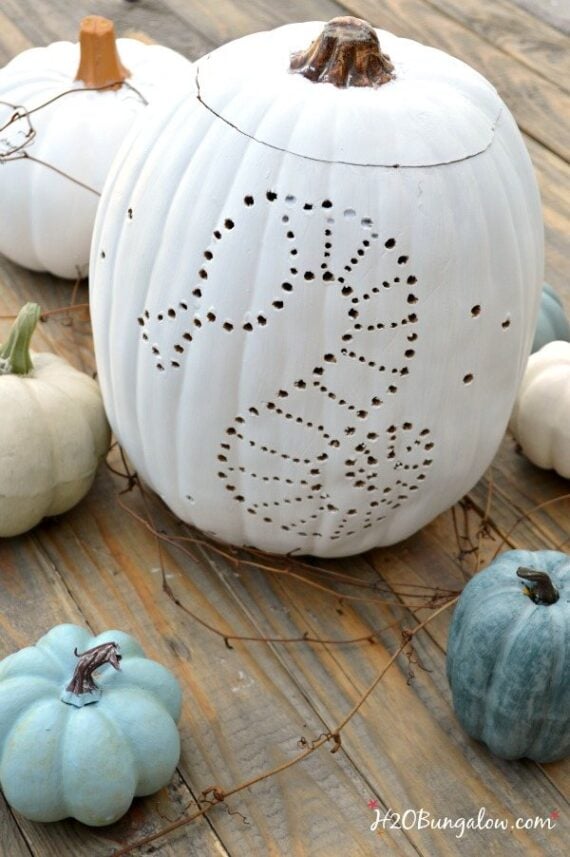
Turns out, drilling looks even better on a white pumpkin! We love this seahorse-inspired drilled pumpkin from H2O Bungalow.
You could also try polka dots, stars or constellations, spirals, faces, monograms, or pretty much anything else your heart desires!
Try Drilling Your Pumpkins This Fall!
We hope you loved our project, “Pumpkin Carving with a Drill”! We think you will also want to jump on over to 16 Cool Pumpkin Carving Ideas, Fall Front Door Decorations, and DIY Outdoor Halloween Yard Decorations! Also jump on over to our sister site, OhMeOhMy, and check out our post on Pumpkin Decorating Ideas – 11 Pretty Pumpkin Ideas. And if you are ready to start crafting for the holiday season, check out our DIY Mason Jar Luminaries over at TBD!
[adsenseyu2]
Put Vaseline on all carved areas of the pumpkin. It seals it and makes them last much longer. If you can put it in the fridge, then they will last for months!
Cleaning the pumpkin with bleach & water kills the bacteria.. don’t know about a cut/drilled pumpkin. I do this to hard skinned veggies/fruits to make them last longer. Harvested squash in Oct; keep in cool place, and I had squash still in April. The Vaseline works fairly well. The little packet idea sound like a winner to me…. after you kill the bacteria on the outside.
This will be the first time I’ve carved a pumpkin in my 67 years. Part of my bucket list through life. So looking forward two I have. But my issue is there a small sample I could buy for pumpkins.
I know this request must odd to some viewers when I think my Mom never learned how to ride a bike or to swim. We as my Dad & Mom’s generation didn’t have much but appreciated what they did and cherished. So if any lesson here is to appreciate what you’re given not complaint about it. Mom passed in 2009 at 97 years young and is missed everyday.
Carol Aksamit Hawkins
You can buy little pumpkin carving kits at Wal-Mart or any dollar General store. They have super cute patterns. You can also Google patterns online and print some off for free. I hope you get to carve your pumpkin! I’m excited for you!
i heard wiping the inside of pumpkins with vaseline does the trick (or treat)
I work at pharmacy and the little packets that come in pill bottles to keep out moisture work get to keep your carved pumpkin lasting longer. Pharmacies throw them away, we use them to keep our animals dry food from molding as well. Just ask the pharmacy to save them for you.
Nice tip! We’ll have to try that! Thanks!
That’s awesome idea about moisture packets I do have some on hand. But also have the small canisters kind can they work as well ?
Had to be a reason their use.
Carol Aksamit Hawkins
I totally have to try this. I LOVE POWER TOOLS! VROOMMMMMMM!!!!!!!!!!!!!!