
If you’re getting ready to start a kitchen garden for the first time, you’ll probably be blown away by the number of products you’ll be told you need. Planters, fertilizer, labels, more fertilizer, and all kinds of tools.
The truth is, though, you really don’t need that much! I get my veggie garden going each year with just a few essential items: seeds, egg cartons (instead of planters), and seed starting soil mix. I love a good budget gardening hack – and this may be one of the easiest. Here’s how to do it!

What Seeds Can You Grow in Egg Cartons?
You can use egg cartons for just about any seed you would normally start from seed in a plastic punnet or tray. I find them great for:
- Herbs (basil, cilantro, dill)
- Tomatoes
- Peppers
I’ve also used them for lettuces, beans, peas, cucumbers, zucchini, and watermelons, though I generally find it’s just easier to sow these seeds directly into containers or garden beds. Some plants (like cucumbers and zucchinis) don’t always like being transplanted, and I have more success if I sow them into their final destination right away.
Need extra guidance? Check out our list of the best plants to grow from seed and you’ll have lots of ideas on what to plant.
How to Grow Seeds in Egg Cartons for Cheap
This isn’t just a cheap way to get your seeds started, it’s also really easy! I find it even easier than using those plastic trays for seeds, because you can throw each cardboard portion into the ground with the seedling without disturbing the roots – they’re biodegradable. That means this gardening hack isn’t just convenient, it’s eco-friendly too!
Choosing Your Soil
Pay attention – this is the most important part! When you’re starting seeds from scratch, you absolutely need to use seed-starting mix. At first I thought this was another corner I could cut, and I tried to use regular potting mix instead, but my seedlings really struggled.
Seed-starting mix is more sterile than regular potting mix, which protects your baby plants against common fungal infections. If you’ve ever dealt with damping off (a fungal disease where your seedlings collapse and die), you’ll know how frustrating it is. I promise you’ll have better success with seed-starting mix!
If you don’t have any seed-starting mix and you’re determined to forge on without it, you can try to use regular potting mix. Just pick out the larger bits of bark/any chunks that will get in the way of your seeds. If you’re only planting larger seeds (corn, peas, zucchini, etc), you’ll probably be ok with potting mix. Smaller seeds (herbs, tomatoes, peppers) will be a lot happier in a seed-starting mix.
Planning Your Set-Up
Each egg carton has 12 compartments. In each compartment, I make two little holes, and put two seeds in each hole. So, in theory, you can fit 48 seedlings in one egg carton. However, if they all germinate, you’ll have to thin them out (basically kill some) so they’re not competing with each other.
Why put 4 seeds in each compartment if you’re just going to have to thin them out? Because there’s a good chance not all your seeds will germinate, it just gives you a higher chance of ending up with 1-2 seedlings per compartment, which is the goal.
Make sure you have a good location to set up your upcycled seed trays – somewhere that stays relatively warm and gets decent sunlight. Check out our guide to starting seeds indoors for some helpful tips on sett
Planting the Seeds
Now for the fun part! Here’s how to plant your seeds:
- If the lid is attached to the egg carton, tear or cut it off and place it underneath, as a tray
- Use a Sharpie to label the carton on the outside in a way that makes sense for you
- Seriously, label it. You won’t remember what you planted even if you think you will
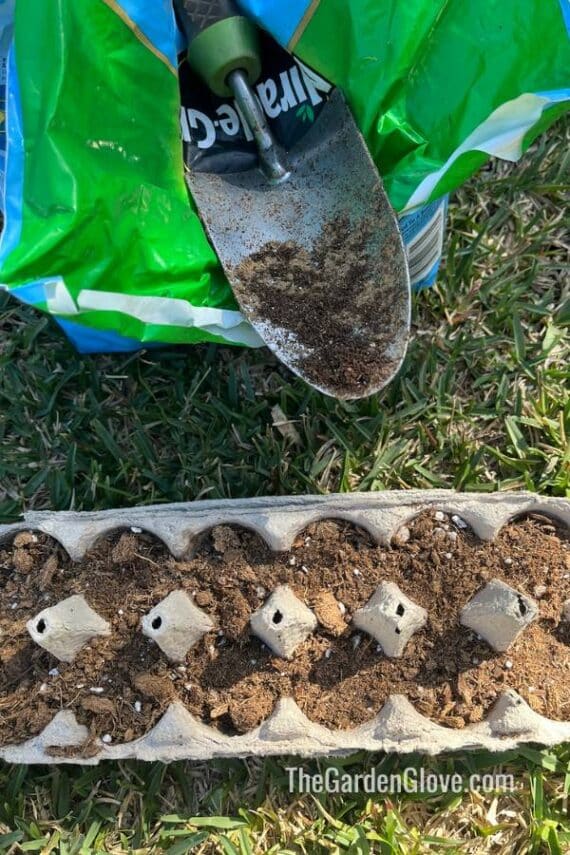
- Sprinkle seed-raising mix into each individual compartment
- Wet the soil with a spray bottle or very gently with a hose
- Poke two little holes in the soil in each compartment, about halfway to the bottom
- Add two seeds to each hole (so you’ll have four seeds total per egg compartment)
- Gently cover the holes
- Spray or water each compartment again
That’s it! You can’t really mess it up, just make sure you don’t blast the egg carton with the hose or you’ll lose all your soil (and seeds).
Waiting for Germination
Stay patient – most seeds will take at least two weeks to germinate. During this time, you’ll need to:
- Keep the soil damp at all times (without saturating the cardboard carton)
- Keep the egg carton in a warm, sunny spot (preferably by a window indoors)
- Place the egg carton outside if it’s 70 degrees or warmer (bring it in at night)
They don’t need to be soaking wet overnight, but damp enough that the soil doesn’t dry out. I usually spray them in the morning, then sometimes mid-afternoon if they’re out in the sun. If you end up with 3-4 seedlings per compartment, pinch off the smallest/weakest looking ones so you only have 2 per compartment – it might seem cruel but they’ll grow stronger and healthier this way!
When (and How) to Transplant Seedlings from Egg Cartons
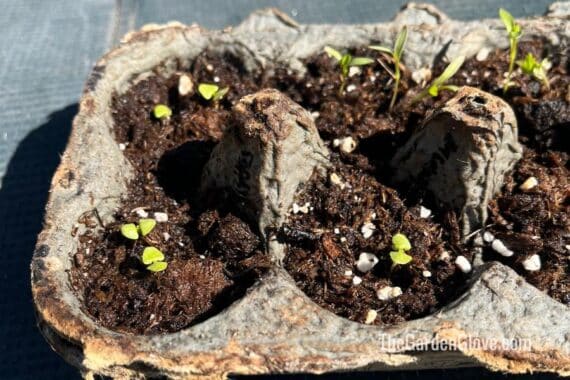
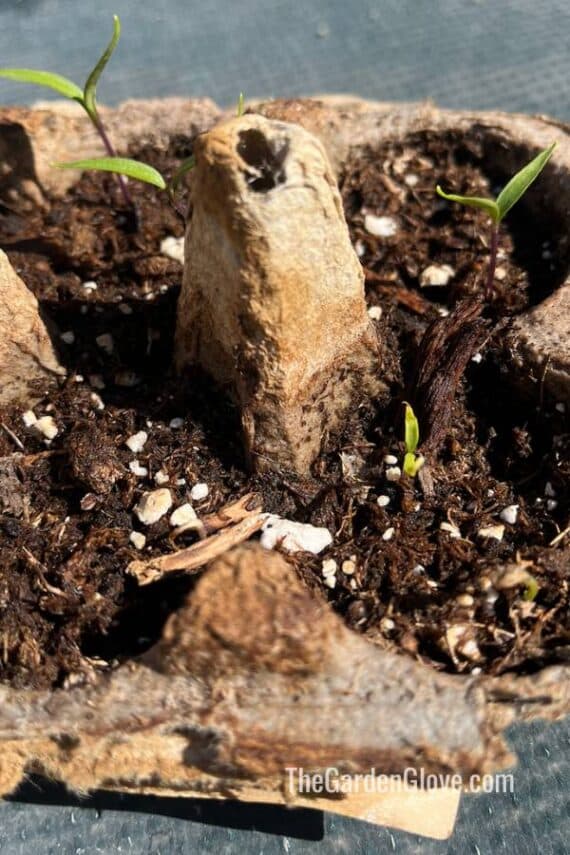
There’s nothing more exciting than seeing your seedlings pop their little heads out of the soil! They’ll generally start with two generic-looking leaves, these are the cotyledons or seed leaves. After a couple more weeks of sunshine and water, they’ll start to develop their first set of true leaves, which look more like the plant you’re expecting.
During this time, keep your seeds damp and sunny. You can move them outside during the day – they can handle full sun but if you have cold overnight temperatures, keep bringing them inside while they’re still babies.
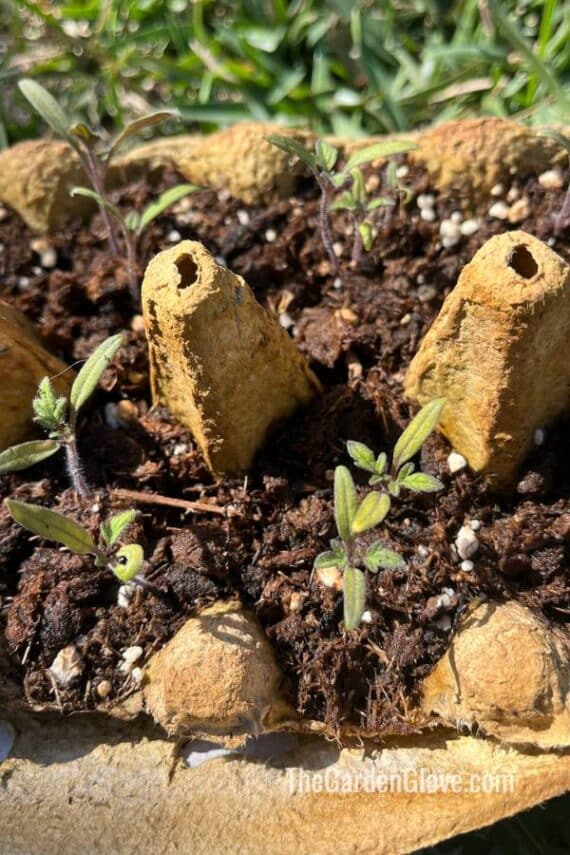
Knowing When Your Seedlings Are Ready to Transplant
Once your seedlings have their true leaves, you can start hardening them off. Basically, this means leaving them outside overnight and getting them ready for the harsh reality of the real world. After about a week of hardening off, you can transplant your seedlings.
Transferring to Pots or Garden Beds
Transplanting your seedlings can be a bit fiddly, but I think it’s easier to do it from egg cartons than punnets, especially if you only have one seedling per compartment. Either way, make sure the soil is damp. If you’re transplanting into a container, make sure you’ve got your soil in it ready to go, it’s labeled, and everything is wet.
If you have multiple seedlings per compartment, you’ll need to gently separate them and remove them from the compartment. Don’t worry if you lose a few roots, they usually bounce back. Make a little hole for them in their new home, put them in the soil, then pat the dirt around them tightly. When you’re done, give them a gentle watering.
If you just have one seedling per compartment, cut or tear the egg carton into 12 individual compartments and plant each one in its desired spot – it will break down quickly and it minimizes root shock for your transplants. Cover with soil and water – it’s that easy!
Save Money Growing Your Seeds in Egg Cartons!
The moral of the story? Keep your old egg cartons and start your seedlings in them! You won’t need to buy plastic punnets, they’re easier to label, and you can throw each compartment into the ground when you’re ready to plant. Good luck!
And guess what? There are so many other clever gardening tricks that reduce waste and happen to be super convenient, too! Check out our guide to garden fertilizers you can make with kitchen scraps and you’ll see your food waste in a whole new light. And if you’ve just decided to get started, be sure to head on over to our tips on how to start a kitchen garden!